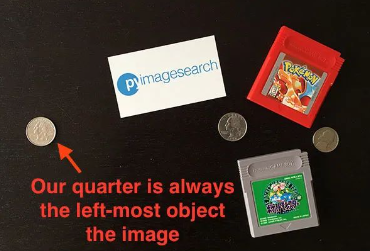
计算物体之间的距离与计算图像中物体的大小算法思路非常相似——都是从参考对象开始的。我们将使用0.25美分作为我们的参考对象,它的宽度为0.955英寸。
并且我们还将0.25美分总是放在图片最左侧使其容易识别。这样它就满足了我们上面提到的参考对象的两个特征。

我们的目标是找到0.25美分,然后利用0.25美分的尺寸来测量0.25美分硬币与所有其他物体之间的距离。
定义参考对象并计算距离
打开一个新文件,将其命名为distance_between.py,插入以下代码:
# import the necessary packages
from scipy.spatial import distance as dist
from imutils import perspective
from imutils import contours
import numpy as np
import argparse
import imutils
import cv2
def midpoint(ptA, ptB):
return ((ptA[0] + ptB[0]) * 0.5, (ptA[1] + ptB[1]) * 0.5)
# construct the argument parse and parse the arguments
ap = argparse.ArgumentParser()
ap.add_argument("-i", "--image", required=True,
help="path to the input image")
ap.add_argument("-w", "--width", type=float, required=True,
help="width of the left-most object in the image (in inches)")
args = vars(ap.parse_args())
我们这里的代码与上周的代码几乎相同。我们从在第2-8行上导入所需的Python包开始。
第12-17行解析命令行参数。这里我们需要两个参数:——image,它是包含我们想要测量的对象的输入图像的路径,以及——width,为我们参考对象的宽度(单位为英寸)。接下来,我们需要对图像进行预处理:
# load the image, convert it to grayscale, and blur it slightly
image = cv2.imread(args["image"])
gray = cv2.cvtColor(image, cv2.COLOR_BGR2GRAY)
gray = cv2.GaussianBlur(gray, (7, 7), 0)
# perform edge detection, then perform a dilation + erosion to
# close gaps in between object edges
edged = cv2.Canny(gray, 50, 100)
edged = cv2.dilate(edged, None, iterations=1)
edged = cv2.erode(edged, None, iterations=1)
# find contours in the edge map
cnts = cv2.findContours(edged.copy(), cv2.RETR_EXTERNAL,
cv2.CHAIN_APPROX_SIMPLE)
cnts = imutils.grab_contours(cnts)
# sort the contours from left-to-right and, then initialize the
# distance colors and reference object
(cnts, _) = contours.sort_contours(cnts)
colors = ((0, 0, 255), (240, 0, 159), (0, 165, 255), (255, 255, 0),
(255, 0, 255))
refObj = None
第2-4行从磁盘加载图像,将其转换为灰度图,然后使用7 x 7内核的高斯滤波器对其进行模糊降噪。
当我们的图像被模糊后,我们应用Canny边缘检测器来检测图像中的边缘,然后进行膨胀+腐蚀来缩小边缘图中的缝隙(第7-9行)。
调用cv2.findContours检测边缘图中对象的轮廓(第11-13行),而第16行从左到右对轮廓进行排序。由于我们知道0.25美分(即参考对象)将始终是图像中最左边,因此从左到右对轮廓进行排序可以确保与参考对象对应的轮廓始终是cnts列表中的第一个。
然后,我们初始化用于绘制距离的colors列表以及refObj变量,该变量将存储参考对象的边界框、质心和pixels-per-metric值(看上一篇就明白pixels-per-metric的具体定义,其实就是参考对象的实际大小(单位英寸)与图片中的宽度(单位为像素)的比值)。
# loop over the contours individually
for c in cnts:
# if the contour is not sufficiently large, ignore it
if cv2.contourArea(c) < 100:
continue
# compute the rotated bounding box of the contour
box = cv2.minAreaRect(c)
box = cv2.cv.BoxPoints(box) if imutils.is_cv2() else cv2.boxPoints(box)
box = np.array(box, dtype="int")
# order the points in the contour such that they appear
# in top-left, top-right, bottom-right, and bottom-left
# order, then draw the outline of the rotated bounding
# box
box = perspective.order_points(box)
# compute the center of the bounding box
cX = np.average(box[:, 0])
cY = np.average(box[:, 1])
在第2行,我们开始对cnts列表中的每个轮廓进行循环。如果轮廓比较小(第4和5行),我们认为是噪声并忽略它。
然后,第7-9行计算当前对象的最小旋转包围框。
第14行上调用order_points函数(此系列第一篇定义的函数)来对矩形框四个顶点以左上角、右上角、右下角和左下角的顺序排列,我们将看到,在计算物体之间的距离时,这一点非常重要。
第16行和第17行通过取边界框在x和y方向上的平均值来计算旋转后的边界框的中心(x, y)坐标。
下一步是校准我们的refObj:
# if this is the first contour we are examining (i.e.,
# the left-most contour), we presume this is the
# reference object
if refObj is None:
# unpack the ordered bounding box, then compute the
# midpoint between the top-left and top-right points,
# followed by the midpoint between the top-right and
# bottom-right
(tl, tr, br, bl) = box
(tlblX, tlblY) = midpoint(tl, bl)
(trbrX, trbrY) = midpoint(tr, br)
# compute the Euclidean distance between the midpoints,
# then construct the reference object
D = dist.euclidean((tlblX, tlblY), (trbrX, trbrY))
refObj = (box, (cX, cY), D / args["width"])
continue
如果refObj为None(第4行),则需要对其进行初始化。
我们首先获取(排序后的)最小旋转边界框坐标,并分别计算四个顶点之间的中点(第10-15行)。
然后计算中点之间的欧氏距离,给出我们的“像素/尺寸”比例,来确定一英寸为多少像素宽度。
最后,我们将refObj实例化为一个3元组,包括:
物体对象的最小旋转矩形对象box
参考对象的质心。
像素/宽度比例,我们将用其来结合物体之间的像素距离来确定物体之间的实际距离。
大林上位机机器视觉_苏州机器视觉培训_苏州上位机培训_苏州工业机器人培训__苏州电工培训_苏州PLC培训最适合电工及plc编程人员学习的上位机机器视觉课程 大林老师:15861139266(微信同号)
下一个代码块负责绘制参考对象和当前检查对象的轮廓,然后定义变量refCoords和objCoords,这样(1)最小包围矩阵坐标和(2)质心的(x, y)坐标都包含在同一个数组中:
# draw the contours on the image
orig = image.copy()
cv2.drawContours(orig, [box.astype("int")], -1, (0, 255, 0), 2)
cv2.drawContours(orig, [refObj[0].astype("int")], -1, (0, 255, 0), 2)
# stack the reference coordinates and the object coordinates
# to include the object center
refCoords = np.vstack([refObj[0], refObj[1]])
objCoords = np.vstack([box, (cX, cY)])
现在我们可以开始计算图像中各个物体的质心和质心之间的距离了:
# loop over the original points
for ((xA, yA), (xB, yB), color) in zip(refCoords, objCoords, colors):
# draw circles corresponding to the current points and
# connect them with a line
cv2.circle(orig, (int(xA), int(yA)), 5, color, -1)
cv2.circle(orig, (int(xB), int(yB)), 5, color, -1)
cv2.line(orig, (int(xA), int(yA)), (int(xB), int(yB)),
color, 2)
# compute the Euclidean distance between the coordinates,
# and then convert the distance in pixels to distance in
# units
D = dist.euclidean((xA, yA), (xB, yB)) / refObj[2]
(mX, mY) = midpoint((xA, yA), (xB, yB))
cv2.putText(orig, "{:.1f}in".format(D), (int(mX), int(mY - 10)),
cv2.FONT_HERSHEY_SIMPLEX, 0.55, color, 2)
# show the output image
cv2.imshow("Image", orig)
cv2.waitKey(0)
在第2行,我们开始对图片中物体对象的顶点(x, y)坐标进行循环。
然后我们画一个圆表示我们正在计算距离的当前点坐标,并画一条线连接这些点(第5-7条线)。
然后,第12行计算参考位置和对象位置之间的欧式距离,然后除以“像素/度量”,得到两个对象之间的实际距离(以英寸为单位)。然后在图像上标识出计算的距离(第13-15行)。
距离测量结果
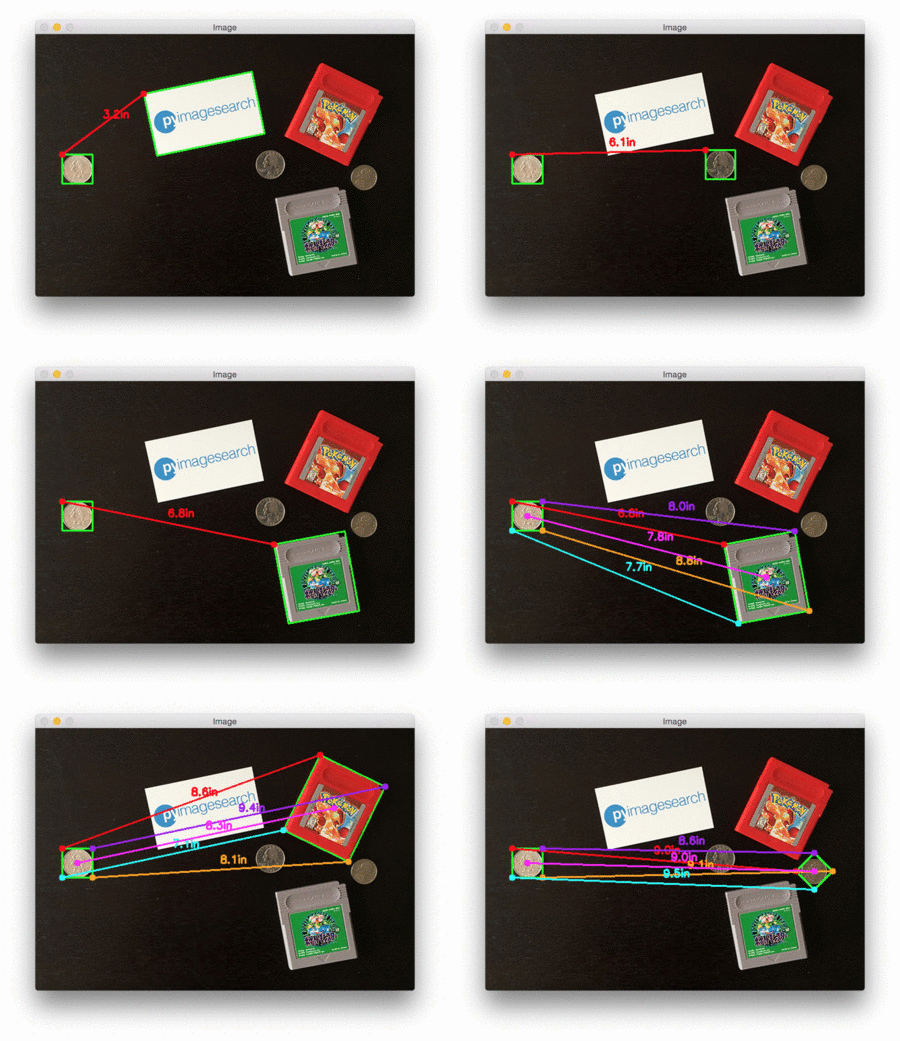
下面是一个GIF动画,演示了我们的程序运行效果:

在每种情况下,我们的脚本都匹配左上(红色)、右上(紫色)、右下(橙色)、左下(蓝绿色)和质心(粉色)坐标,然后计算参考对象和当前对象之间的距离(以英寸为单位)。
注意图像中的两个0.25美分完全平行,这意味着所有五个顶点之间的距离均为6.1英寸。
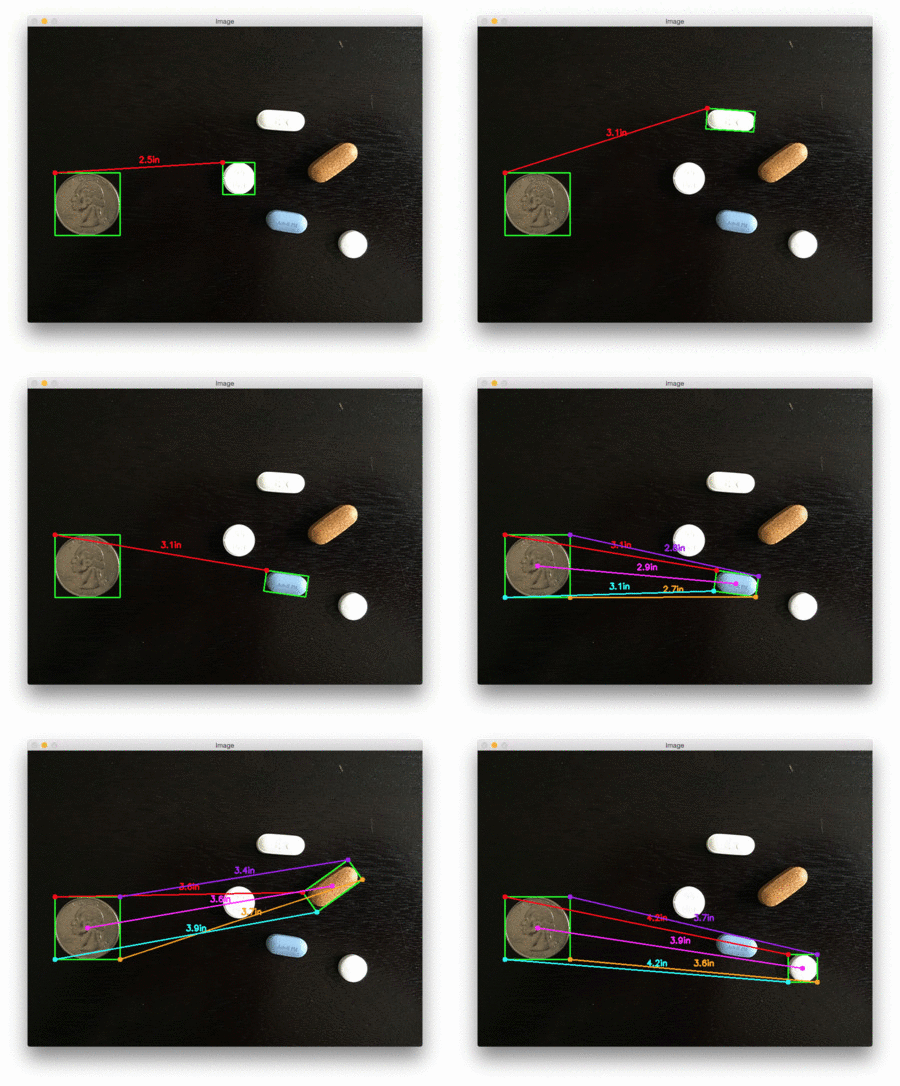
下面是第二个例子,这次计算的是参考对象和药丸之间的距离:

这个例子可以作为药片分类机器人的输入,自动获取一组药片,并根据它们的大小和与药片容器的距离来组织它们。
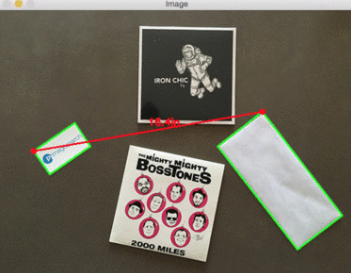
最后一个例子计算了我们的参考对象(一张3.5英寸x 2英寸的名片)和一组7英寸的黑胶唱片和信封之间的距离:

